
How to Use the Japan Trip Planners Itinerary Builder
A practical walkthrough of the Japan Trip Planners itinerary builder: start with your route, add the moments that matter, leave realistic travel time, and keep the details you need in one clear calendar.
Affiliate disclosure: Some links in this article may earn Japan Trip Planners a commission at no extra cost to you. Recommendations are included when they are genuinely useful for planning, and you should still compare current prices, terms, and official provider information before booking.
Start with the trip shape, not a crowded wish list
The strongest Japan itinerary starts with a route. Before you add temples, shopping streets, museums, food stops, and day trips, decide where you are arriving, where you are leaving, how many nights belong in each city, and when you need to change hotels. That simple structure gives the calendar a realistic foundation.
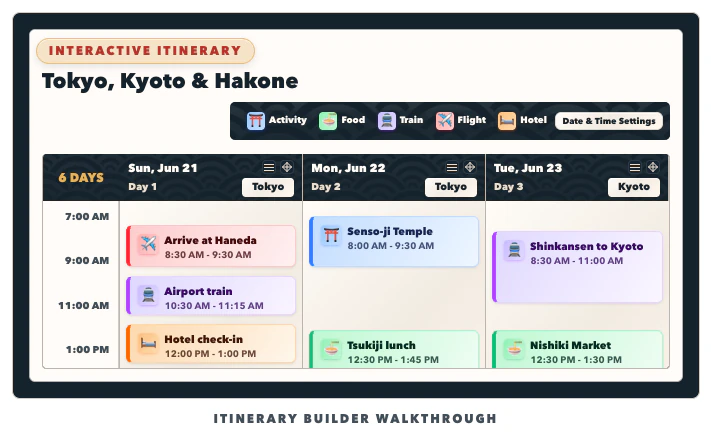
Open the Itinerary Builder and create a blank trip. Give it a name you will recognize later, add your travel dates, then set the cities or bases you expect to use. Think in nights as well as dates: a three-night stay in Tokyo usually means a hotel check-in on the first Tokyo day and check-out on the fourth morning. Hotel moves, luggage, station navigation, and airport transfers all need real time in the plan.
If you are starting before you have booked everything, that is completely fine. Use approximate dates and city order first. The builder is most useful when it helps you see whether the route feels comfortable before you lock yourself into scattered reservations.
Build the calendar around what cannot move
Once the route is in place, add the pieces that have a fixed time first: flights, hotel check-ins and check-outs, timed attraction tickets, train reservations, airport transfers, and any restaurant or tour reservation that matters to you. These are the anchors of the day. Everything flexible should fit around them rather than compete with them.
To add an item, use the plus control in the day column or select an open place on the calendar. Choose the event type, name it specifically, give it a realistic start and finish time, and add notes you will want to see during the trip. A title such as Tokyo Tower at sunset is much more useful than a vague label such as Sightseeing. A transport event such as Local train from Shibuya to Asakusa makes the plan easier to follow than assuming you will remember the transfer later.
For a full sightseeing day, it is often helpful to begin the first activity around 9:00 AM. Group the rest of the day by neighborhood or corridor. If you are visiting Asakusa, Ueno, and Akihabara, keep the middle of the day in that side of Tokyo instead of inserting a cross-city detour. The same principle matters in Kyoto, Osaka, Hiroshima, and every smaller city: a shorter list in one area usually feels better than an ambitious list connected by constant trains.
Give transit, luggage, and meals the time they really need
Japan has excellent transit, but a train journey is more than the time printed between two stations. You may need to walk to the station, find the correct entrance, navigate ticket gates and platforms, wait for a train, transfer lines, choose the correct exit, and walk again at the other end. Add breathing room, especially on your first days, during rush hour, with luggage, or before a timed entry.
City-change days deserve their own structure. Check out of the first hotel, get to the departure station, travel, reach the next hotel, store luggage or check in, then start with a nearby activity. Do not treat a Tokyo-to-Kyoto train ride as an empty gap between two full sightseeing days. When you see that block on the calendar, you can make a more realistic choice about what fits afterward.
Meals do not always need their own scheduled event. If you are spending several hours around Nishiki Market, Dotonbori, a museum district, or a shopping neighborhood, food can happen naturally there. Add a meal event when it is a real reservation, a place you do not want to miss, or a useful pause in a long day.
Save places from the map, then place them near each other
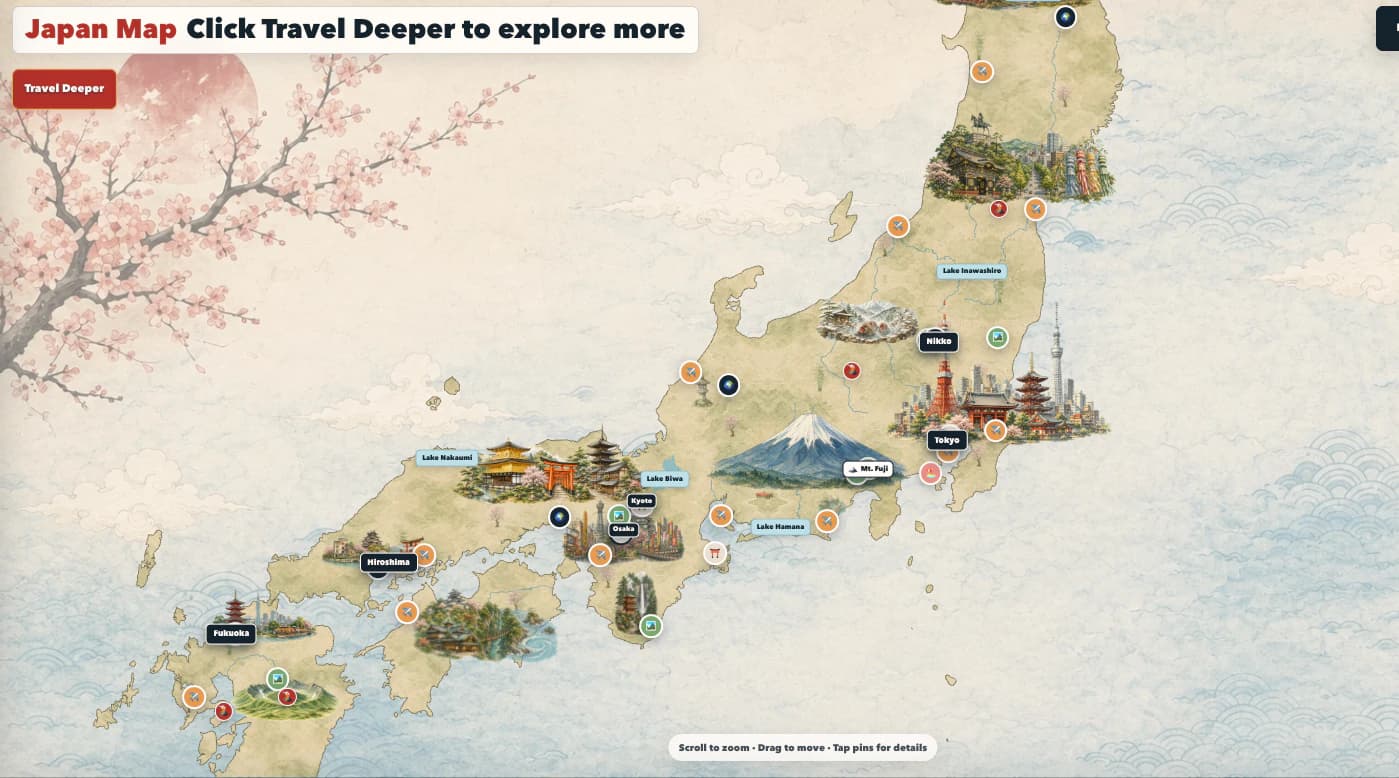
The Interactive Map is a good place to collect ideas before you decide which day they belong on. Use the category layers and location cards to find cities, attractions, shrines, museums, nature stops, rail stations, and other useful planning points. Save the places that fit your trip, then open Saved Places from the itinerary sidebar when you are ready to schedule them.
A saved pin is an idea, not a promise that it belongs in the plan. Look at the city, the surrounding locations, the time needed, and the rest of that day before adding it. This is how you avoid building a Tokyo day with an early temple in Asakusa, an afternoon attraction in Odaiba, and an evening reservation across the city without enough travel time.
If you are traveling with someone else, saved places are also an easy way to collect both travelers' priorities before choosing the final schedule. Keep the list broad at first, then turn only the strongest nearby choices into calendar events.
Keep the details with the event, not scattered across apps
Use event notes for the information that will matter when you are on the move: reservation numbers, ticket links, meeting points, station exits, luggage instructions, booking windows, hotel addresses, and reminders about what to bring. A clean event note can save you from searching through old emails at the station or outside a venue.
For activities with prepaid admission or limited entry, add the official booking link or the ticket source you used. For a hotel move, note whether the hotel can hold bags before check-in. For transport, keep the departure station, arrival station, and any reservation guidance together. The goal is not to create a second guidebook inside every event. It is to keep the few details you are most likely to need immediately available beside the correct part of the day.
The Travel Notes panel is better for trip-wide information, such as your travel insurance policy, pocket Wi-Fi instructions, rail-pass notes, packing reminders, or general things to confirm before departure.
Use the budget calculator to make choices earlier
The budget calculator keeps your big categories visible: flights, accommodations, transportation, food, activities, shopping, and other spending. Add rough figures early, then replace them with booked amounts as the trip comes together. Seeing the total while you plan makes it easier to decide whether an extra hotel night, a rail pass, a day tour, or a shopping budget fits comfortably.
The calculator is not meant to make a trip rigid. It is there to stop surprises. A flexible food amount, a cushion for local trains, and a clear activities total can be more useful than trying to predict every small purchase. Review the daily average alongside the total if you want a quick sense of whether the route is becoming more expensive than expected.
Travel details can change. Confirm current schedules, opening hours, reservation rules, prices, and entry requirements with the relevant official provider before booking or traveling.